Allergen-Free Rice Flour Pullman Loaf. To make a pullman loaf, you'll need a lidded pullman pan. If you don't have one, you could use this I recently picked up a pullman loaf pan. Pullman loaf pans (aka Pullman bread pans) make a perfectly rectangular loaf of bread that is consistent in width and height for its entire length, so that when sliced it yields consistently-sized, perfectly square slices of bread for sandwiches.
 I live the ketogenic lifestyle; and this pan helps me create the most scrumptious, beautiful loaves of cinnamon pecan bread or frosted lemon loaf.
It's called a Pullman pan, and it has very straight sides and a lid that slides on top to keep the loaf entirely contained.
Many pumpernickel bread recipes also call for using a Pullman pan.
You can cook Allergen-Free Rice Flour Pullman Loaf using 7 ingredients and 9 steps. Here is how you achieve that.
I live the ketogenic lifestyle; and this pan helps me create the most scrumptious, beautiful loaves of cinnamon pecan bread or frosted lemon loaf.
It's called a Pullman pan, and it has very straight sides and a lid that slides on top to keep the loaf entirely contained.
Many pumpernickel bread recipes also call for using a Pullman pan.
You can cook Allergen-Free Rice Flour Pullman Loaf using 7 ingredients and 9 steps. Here is how you achieve that.
Ingredients of Allergen-Free Rice Flour Pullman Loaf
- It's of Joshinko.
- Prepare of Corn starch (or joshinko).
- It's of Sugar.
- It's of Salt.
- It's of and 1/2 to 2 teaspoons Dry yeast.
- It's of Margarine.
- Prepare of cc to 270 cc Lukewarm water.
It helps to get that dense, chewy crumb and to keep the loaf from drying out during the traditionally long baking time. The Best Pullman Bread Recipes on Yummly Banana Bread, Pizza Garlic Bread, Herbed Garlic Bread. Do you have any food allergies?
Allergen-Free Rice Flour Pullman Loaf step by step
- Coat the inside of a plastic container with margarine (not listed)..
- Combine all the ingredients except for the water, then add lukewarm water until the dough thickens..
- Pour the dough into the prepared loaf-shaped plastic mold, and lightly wrap with saran wrap. The batter will fill the container about 80 percent..
- Set the Tupperware on top of two chopsticks, and cook in the microwave for 30 seconds (40 seconds in the winter) at 500 W. Leave in the microwave for 30 to 40 minutes to let the dough rise..
- Helpful tip: While the dough is rising, set two cups filled with hot water in the microwave to maintain the temperature..
- It is finished rising once the dough rises to the top of the container. (It may take up to 50 to 60 minutes to rise in the winter.).
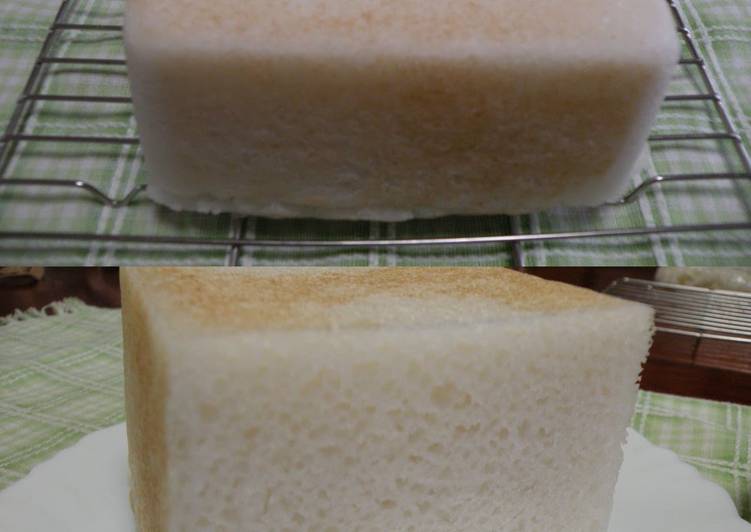
- Without removing the saran wrap, heat for 6 minutes at 500 W, then it's done.(The above photo shows the baked bread.) Remove from the container while still hot, and cool..
- It's tasty and fluffy right out of the oven (Step 7), but my family likes a baked finish, so I brown the crust in a pan..
- Place on a rack until the heat dissipates. It should have a fluffy texture, but if it gets tough, microwave for a few seconds to soften..
I'm working up the nerve to try Hamelman's pumpernickel bread; the heavy-duty European one. Make delicious bread at your bakery with commercial bread pans & loaf pans! A wide variety of rice flour price options are available to you, such as made from, certification, and type. This Pullman Loaf Pan with Cover is a product that one really has to see and hold in their hands to fully appreciate its quality. *Hard anodized pans are made from aluminum. Pullman Loaf Pan & Cover - Large.

